Rfam Cloud pipeline
The Rfam Cloud environment provides access to the command-line interface for curating Rfam families. It uses the same software and the sequence database as the ones used by the Rfam team. The pipeline allows one to create a new RNA family or update an existing Rfam entry.
Background
The main Rfam family building pipeline is located on the EMBL-EBI computational cluster, so that only the EBI account holders can access it. In order to enable more users to contribute to Rfam, a new version of the pipeline was developed using a cloud infrastructure so that the EBI accounts are not needed. All families built using the cloud pipeline are reviewed by the Rfam team before the families are added to Rfam.
Requirements
A computer with internet access (Mac, Linux, or PC)
A command line environment supporting
ssh(for example, bash)An Rfam Cloud account
Requesting an Rfam Cloud account
Please Contact us to request access to the Rfam family building pipeline. If you intend to use the pipeline for teaching purposes, please let us know in advance to ensure that the pipeline can support the workload.
Connecting to Rfam Cloud
Use the username and password provided by the Rfam team to ssh to Rfam Cloud:
ssh <username>@cloud.rfam.org
To get access to an interactive session and start using the pipeline run the following command:
rfcloud --start
You should see a command line prompt:
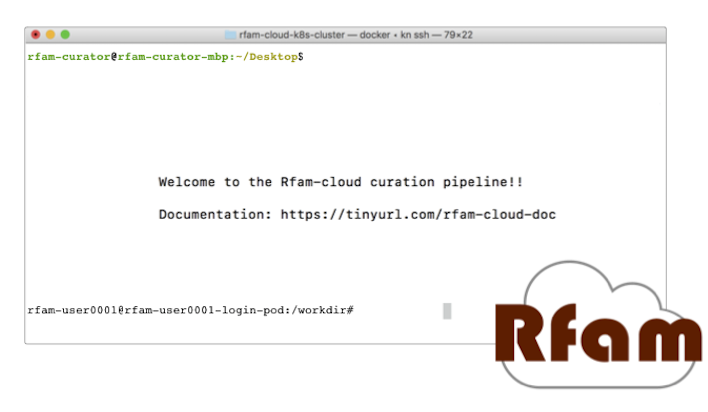
Rfam Cloud command line prompt
To verify that the system works, try calling the rfsearch and rfmake scripts (you should see help messages explaining how to use the scripts):
rfsearch.pl -h
rfmake.pl -h

10 steps for building an Rfam family
✏️ Interested in editing an Rfam family? Skip to Updating an existing Rfam family.
1. Create a new folder
📂 Create a new folder, for example rfam_test and navigate to it:
mkdir rfam_test
cd rfam_test
2. Prepare a SEED file
Each family has a Seed alignment file called SEED that contains a multiple sequence alignment of the confirmed instances of a family. To get started, you will need a Stockholm format file with at least 1 RNA sequence and a consensus secondary structure, for example see the tRNA seed alignment.
If you have a FASTA file called file.fasta with a single RNA sequence, convert it to Stockholm format and predict a consensus secondary structure using RNAfold (the -r option):
predict_ss.pl -infile <file.fasta> -outfile SEED -r
Alternatively, create a SEED file using the vi or nano text editors and paste the file contents from your local computer. See Copying files to and from Rfam Cloud for instructions about moving files to and from Rfam Cloud.
It is recommended that the sequences are named in the accession:start-end format where accession is an ENA, GenBank, or RNAcentral identifier, and start-end are the coordinates of the RNA in the accession (for example, AB003409.1/96-167). See the tRNA seed alignment for more examples. ⚠️ The sequence name cannot contain the parenthesis characters (( and )).
Once you have a Stockholm file called SEED in your working directory, proceed to the next step.
3. Find similar sequences using rfsearch
Build and calibrate a Covariance model (CM) based on your seed alignment and search for similar sequences in the rfamseq database:
rfsearch.pl -nodesc -relax -t 25
Option |
Meaning |
|
creates a required file called |
|
allow sequences not found in the rfamseq database to be included in the seed alignment (recommended) |
|
Gathering cutoff in bits. Usually 30 bits is a good starting point as most families are expected to have a threshold higher than 30. |
⚠️ This step can take a long time (up to 10 minutes or longer) depending on the size of the alignment and the availability of computational resources.
4. Choose a gathering threshold
The output files (Species file and Outlist file) can be used to determine the gathering threshold for this family (the bit score of the last true positive hit).
Note
For detailed instructions on how to select the threshold, see Choosing gathering threshold.
5. Add sequences to SEED (optional)
The Seed alignment needs to represent the taxonomic diversity and the structural features observed in different instances of the family. A seed alignment needs to have at least 2 sequences but a larger seed alignment is preferred.
Find an accession in the outlist file that you would like to add to the SEED (for example, AB480043.1):
grep AB480043.1 outlist >> addme
rfseed.pl addme
To remove sequences from SEED (if added in error, for example), create a file with a list of accessions you want to remove using grep as described above and call it removeme. Make sure the accession is exactly the same as in the SEED file, for example NW_002196667.1/1438869-1438941. Then run the following command:
rfseed.pl -d -n <removeme>
Consider manually editing the alignment on your local computer using RALEE or belvu and re-uploading it as explained in Step 1.
6. Repeat rfsearch with a new threshold
🔄 Steps 3 to 6 should be repeated until the seed alignment can no longer be improved:
rfsearch.pl -t <new_cutoff> -relax -ignoresm
The -ignoresm option overrides the threshold set at the previous iteration and saved in the DESC file.
This process is known as iteration (see Expanding the seed (iteration) for more information).
7. Create required family files with rfmake
Once the cutoff has been chosen, all the required family files can be generated like this:
rfmake.pl -t <gathering_cutoff> -a
The -a option creates an align file with an alignment of all the sequences above the gathering threshold. For more information about setting the -t parameter, see Choosing gathering threshold.
After running rfmake you should:
review the Align file to check that the threshold is set correctly.
review the Taxinfo file to check that the taxonomic distribution of the family is correct.
Any unwanted sequences can be excluded by rerunning rfmake with a higher threshold -t.
8. Add metadata to the DESC file
Each family is described using in a DESC file (see the tRNA DESC file as an example). The following fields are required:
- ID
a unique ID, such as tRNA or skipping-rope. No spaces are allowed.
- DE
- a short description of the family.Example:
DE GlmZ RNA activator of glmS mRNA⚠️ Maximum 75 characters. - AU
Author name with an ORCID id. Multiple
AUlines can be used. Example:AU Eddy SR; 0000-0001-6676-4706- SE
Seed alignment source. Example:
SE Published; PMID:21994249;- SS
Secondary structure source. Examples:
SS Published; PMID:28977401;SS Predicted; mfold;
- TP
One of Rfam RNA types. Example: TP Gene; sRNA;
- DR
A reference to a Gene Ontology or Sequence Ontology term. Multiple
DRlines can be used. Example:DR SO; 0000253; tRNA;DR GO; 0030533; triplet codon-amino acid adaptor activity;
You may find the QuickGO website useful for finding GO terms. A link to a website can also be included, for example:
DR URL; http://telomerase.asu.edu/;- CC
A free text comment describing what is known about the RNA (function, taxonomic distribution, experimental validation etc). ⚠️ Maximum 80 characters per line, but multiple
CClines can be used.- WK
A Wikipedia link (you should create a new Wikipedia article or link to an existing one). Example:
WK Transfer_RNA
📚 To add literature references, use the following command that automatically imports information from PubMed:
add_ref.pl <pubmed_id>
⚠️ The GA, TC, NC, BM, CV, SM lines are added automatically, please do not change them manually. The RN, RM, RT, RA, and RL lines are added by the add_ref.pl script. The AC field is assigned once the family is stored in the official Rfam database.
9. Perform quality control checks
The rqc-all script performs multiple quality controls on the family. It checks the file formats, the accessions, and the DESC file:
cd .. && rqc-all.pl rfam_test
10. Send SEED and DESC files for review
Download your SEED and DESC files to your local machine and send the files to the Rfam team for review by email or Slack. 🎉🎉🎉
See Copying files to and from Rfam Cloud for instructions about moving files to and from Rfam Cloud.
Danger
We encourage you to always keep a local copy of the important data!
Updating an existing Rfam family
The only difference between creating a new family and updating an existing one is that the SEED and DESC files are retrieved from Rfam:
rfco.pl <RF0XXXX>
cd <RF0XXXX>
After that, follow the family building instructions: 3. Find similar sequences using rfsearch.
Copying files to and from Rfam Cloud
The Rfam Cloud consists of a login node that handles the account login and worker pods which control the Rfam family building pipeline. When you run ssh <username>@cloud.rfam.org you are connected directly to your worker pod.
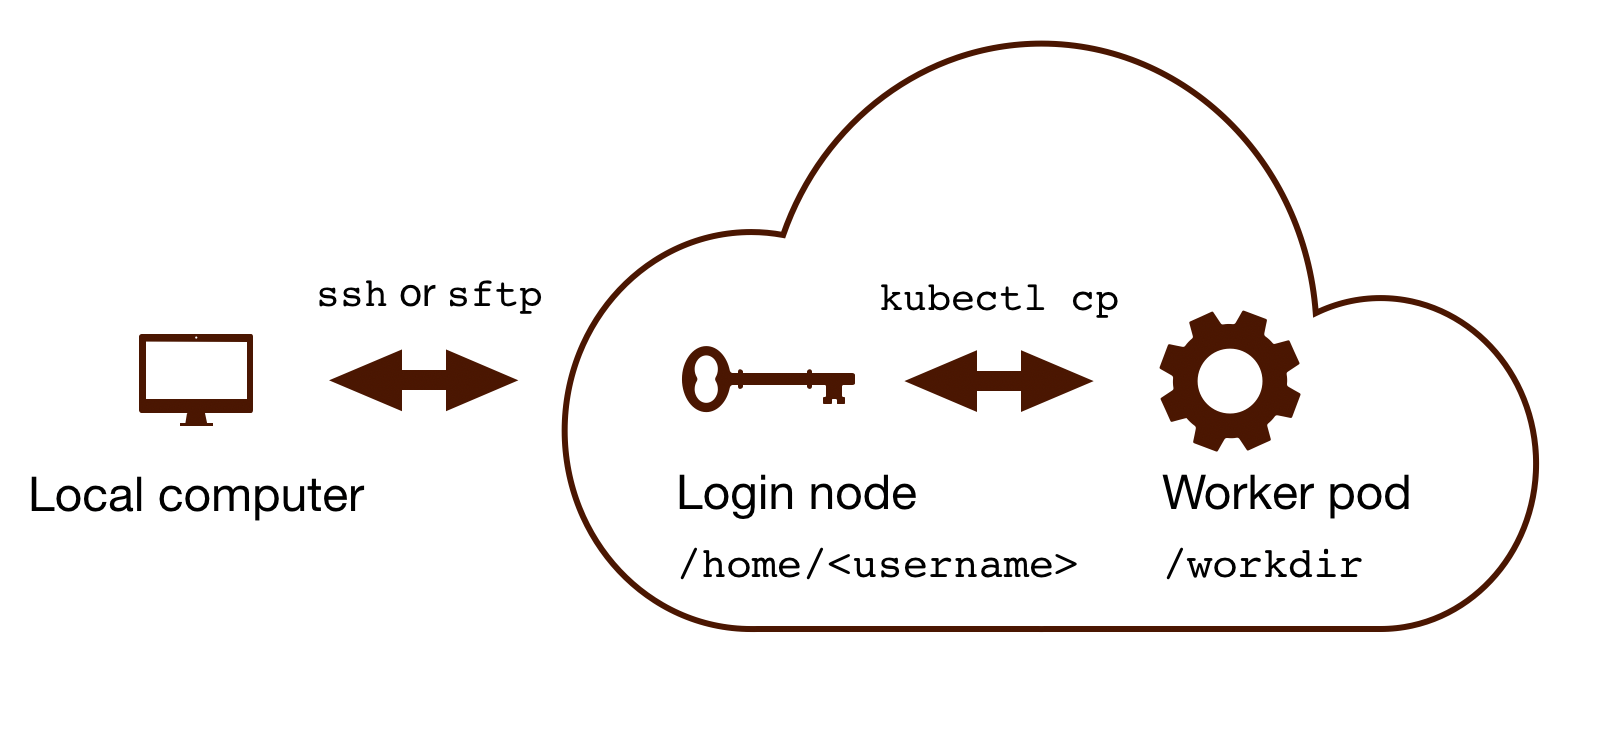
The login node and the worker pods currently have different filesystems which means that if you are on the worker pod you cannot see the files on the login node and vice versa. You can move files to and from login node using scp or sftp but then you need to use kubectl cp to make the files available on the worker pods.
🛠️ Work on unifying the two filesystems is underway which should make moving files to and from Rfam more user-friendly.
Copying files to Rfam Cloud
🖥️ On your local machine:
scp SEED <username>@cloud.rfam.org:/home/<username>
This copies a file SEED to your login node. You can also use an SFTP client for this task (for example, CyberDuck on Mac and Windows).
⚙️ On worker pod:
ssh <username>@cloud.rfam.org
kubectl get pod --selector=user=<username>,tier=frontend
Record the pod_id that looks like rfam-login-pod-<username>-6b9f46fc76-67fhn, then exit to the login node:
exit
🗝️ On login node:
kubectl cp SEED <pod_id>:/workdir
Then get back to the worker pod:
kubectl exec -it <pod_id> bash
The file should appear in your workdir folder. You can specify other paths in the kubectl cp command to move the files to any subfolder.
Copying files from Rfam Cloud
⚙️ On worker pod:
ssh <username>@cloud.rfam.org
kubectl get pod --selector=user=<username>,tier=frontend
Record the pod_id that looks like rfam-login-pod-<username>-6b9f46fc76-67fhn, then exit to the login node:
exit
🗝️ On login node:
kubectl cp <pod_id>:/workdir/SEED .
🖥️ On your local machine:
scp <username>@cloud.rfam.org:/home/<username>/SEED .
Tips and tricks
Filter out redundant sequences. For example, to remove redundancy from a file called align using 95% identify as a cutoff run:
esl-weight -f --idf 0.95 align
Iteratively re-align seed sequences to the CM:
cmbuild --refine SEED.new CM.new SEED
Questions or comments?
Contact us by email, raise an issue on GitHub, or get in touch on Slack.